
Settings — Branding
Your network's logo, icon, heading font and colours, a custom domain for your team's sign-in page, and sending emails from your own domain.
Settings — Branding sets how your network looks to your own team, and the web address and email sender your network uses. Left menu → Settings → Branding. Provider Network Admin only.
What you can do here
- Add your logo, icon, font and colours
- Put your sign-in page on your own domain
- Send emails from your own domain
Add your logo, icon, font and colours
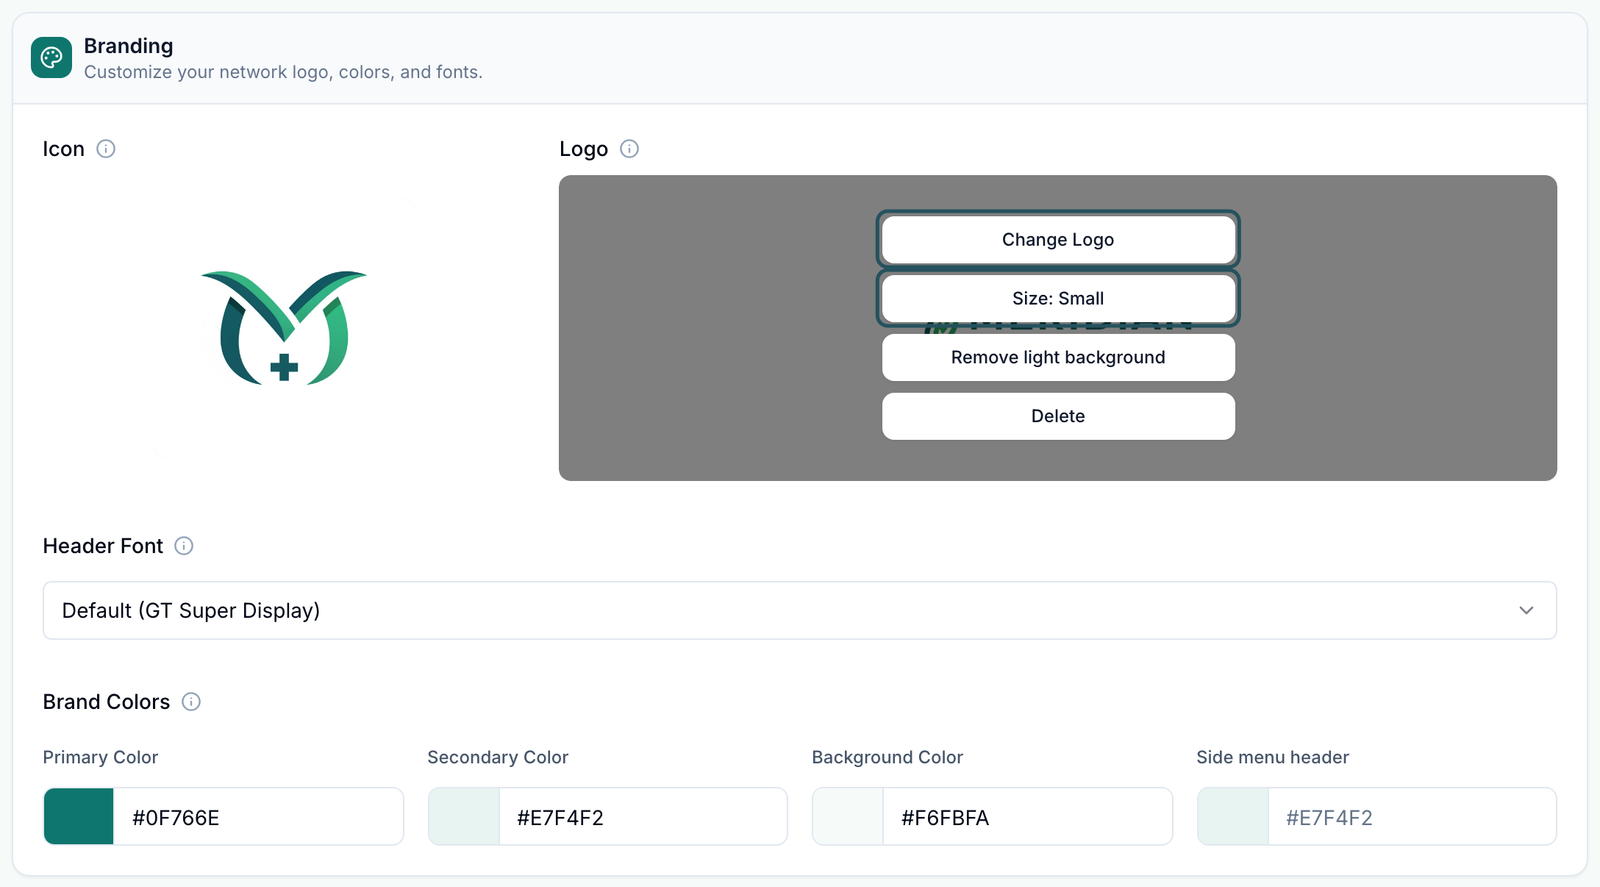
Use this at setup, or when your logo or colours change. The Branding card has no Save button: each change saves as you make it.
Upload the icon
Point at the Icon tile and click Change Icon, position the image in the Crop Network Icon square, and click Save Crop. It becomes the browser-tab icon.
Upload the logo
Point at the Logo tile and click Change Logo, fit the image in the wide 3:1 Crop Network Logo frame, and click Save Crop.
Size the logo
The same tile shows a size button, for example Size: Small; each click moves to the next size. If a white logo disappears on your menu colour, click Add light background.
Pick a heading font
Open Header Font (it starts on Default (GT Super Display)) and choose a serif or sans-serif font. It applies to every heading at once.
Set your colours
Under Brand Colors, type a hex code in Primary Color (buttons and links). Secondary Color and Background Color read Auto-generated until you type your own. Side menu header colours the block behind your logo.
You'll know it worked when the toast reads Network icon updated, Network logo updated or Logo size updated. Fonts and colours save without a toast; reload the page to check them.
Who can do this: Provider Network Admin. The network's name, display name and support email are on Settings — Network overview, not here.
Put your sign-in page on your own domain
Use this when you want your team to sign in at an address such as portal.yourdomain.com. It is optional: everything works on the GEN Health address.
Enter a subdomain
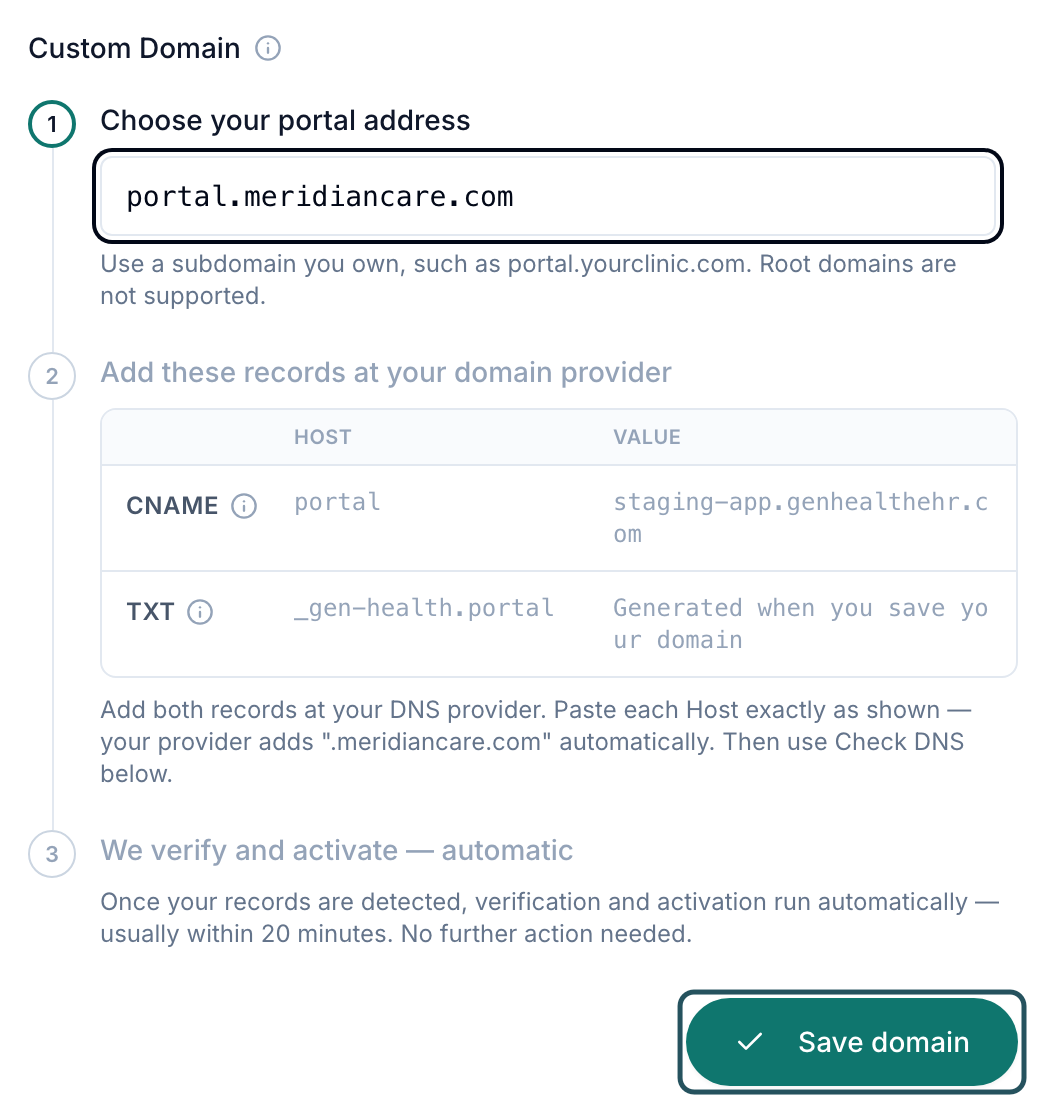
Scroll to Domain management. In Custom Domain, type a subdomain you own. Root domains such as yourdomain.com are not supported.
Save it
Click Save domain. The table under Add these records at your domain provider fills in.
Add the records
Where your DNS is hosted (not always where you bought the domain), add the CNAME and TXT records. Paste each HOST exactly as shown; your provider adds your domain itself. On Cloudflare, turn the proxy off.
Check and activate
Click Check DNS. When every row reads Record detected, activation runs by itself, usually within 20 minutes. If the badge stays on DNS verified, click Activate.
You'll know it worked when the badge reads Active with Your branded portal address is live. Sign-in emails and links use it automatically.
Who can do this: Provider Network Admin, with whoever manages your DNS. Remove domain takes it off again.
Send emails from your own domain
Use this so emails come from your address instead of a GEN Health one. You also need it before Marketing can send email.
Choose the sender
In Email Domain, keep or change From mailbox (the part before the @) and type your Email domain. The line below shows the address people will see.
Save it
Click Save sender address. The TXT (DKIM signature key) and CNAME (Return-path routing) values appear.
Add the records and check
Add both records at your DNS host, then click Check DNS.
You'll know it worked when both records verify and the badge reads Active. Emails switch to your address on their own.
Who can do this: Provider Network Admin.
Statuses you'll see here
| Status | What it means | Who acts next | What you do |
|---|---|---|---|
| Waiting for DNS | The records aren't visible yet | You or your DNS host | Add the records, then Check DNS |
| DNS verified | Records found | GEN Health, automatically | Wait, or click Activate |
| Activating | The certificate is being issued (custom domain only) | GEN Health, automatically | Wait |
| Active | Live | Nobody | Nothing |
| Needs attention | Set-up failed; the reason shows under the badge | You | Fix what it names, then Activate |
What can go wrong
| What you see | Why | Fix |
|---|---|---|
| Records are added but Check DNS still says Waiting for this record | The records went to the registrar while DNS is hosted elsewhere, the HOST was pasted with the domain twice, or the Cloudflare proxy is on | Add them where your nameservers point, paste the host exactly as shown, set DNS only, then Check DNS. |
| A client's DNS email shows a different CNAME from this page | Your network and each client have their own domain and their own records | For your network's domain, use the records on this page only. |
| People see This site can't provide a secure connection on your domain | The certificate isn't issued yet | Keep the certificate record, click Check DNS, then Activate. Still failing after an hour: raise a ticket in Support to GEN Health. |
| Enter a subdomain | The field is empty or holds a root domain | Use a subdomain such as portal.yourdomain.com. |
| Your logo vanishes in the left menu | A white or transparent logo on a dark Side menu header | Click Add light background, or lighten Side menu header. |
Questions people ask
Do our linked clients' patients see our branding?
No. Patients see their client's logo and colours, which the client sets on its own Settings — Branding. Yours shows to your network's admins, providers and delegates.
Where do I change the network's name?
On Settings → Network overview: Network Name, Display Name and Support Email.
Is there a branded sign-in link or URL slug for the network?
No. That exists for clients only. A network's branded address is the Custom Domain.
Do we need a custom domain at all?
No. Both domain panels are optional and independent. Set up the email domain if you want to send Marketing emails.
Related
Was this helpful?